My latest project was to cleanup and mount my birthday present to myself, A Lathemaster 5″ 5C tru-setting chuck. I made two mods right off the bat, studs for mounting it to the spindle, and brass tip set screws for adjusting the run out. Overall I’m very please with the chuck, considering the price point. In the video I demonstrate how to hold threded parts in a 3 jaw chuck, without mangling the threads. I also show some finishing inserts, that work really well on small lathes like mine.
My latest project, Is one I have wanted to check off the list for a long time. My lathe didn’t come with a 4 jaw chuck, and I’ve always found workarounds when I needed one, so recently when I came across a good deal on a chuck, I snatched it up. Since my lathe doesn’t use a standard chuck mounting scheme, I had to turn a custom back plate to mount the chuck. Making a back plate is usually a fairly easy task, but since I didn’t have a chuck big enough to hold the back plate blank, I had to devise a work holding scheme using my face plate. This video documents the steps I used to make the back plate.
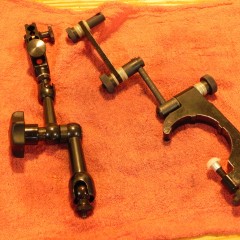
A while back, Tom Lipton did a video on mating a Noga arm to an Indicol body. Last weekend, I decided I wanted one, and set about making one. I used that arm of a a Noga NF61003, and an import Indicol.
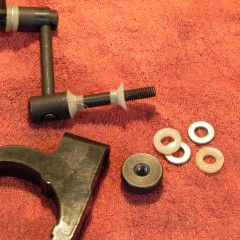
The first step, was to take them apart, and see what I was working with. The arm was fastened to the base with a short M5 thread, that was surprisingly tight for something so small. The Indicol, was as you would expect not much to look at. The knurled nuts, were actually pretty decent, but the bushings & washers, where both pretty poor.
The first machining step was to create a clean reference surface on the Indicol, and to bore out the arm mounting point so that I could fit some brass bushings to it. I made the bushings, because the idea of a steel shaft running inside of a cast aluminum hole wasn’t something I thought vary highly of. Continue Reading…
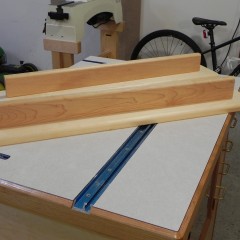
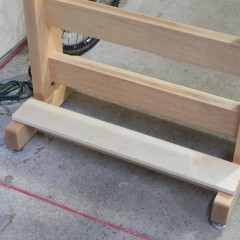
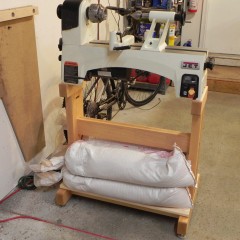
When I built my mini-lathe stand, I intentionally kept it light and simple so I could add onto it in the future (bed extension), and so I could easily move it around my shop. As most people will tell you, a light lathe stand is a sever limitation if you intend to turn a lot of large projects. When I designed my stand, I left room for some accessories what would let me weigh it down. Since I plan on doing some larger projects in the not so distance future, I knocked out the accessories last week.
The design is pretty simple as you can see below. they’re just a T shape platforms that sit on top of the stand feet. I currently have 2 70 lb. sand bags on top of each, and I think they could easily support twice that. So far I’m very pleased with them, as the stand is still very mobile, and I can still get real close to the machine for intricate work.
In the final video of the series, I finish machining the stop, only to find out I won’t be able to use the thumb screws i purchased after all. After recovering from the thumb screw issue, i demonstrate how I lap parts, and how the stop functions when in use. Now that it’s all said an done, I think this was a good project for me to break in the new mill with, as it let me learn what the limits of the machine are.

