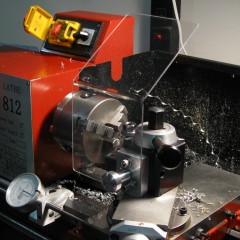
Its seems like I just started on this project, but it’s actually been over 3 months. I guess that means time flies when your having fun, or I’m not as fast as I think I am. Either way, this is the final video in my series about setting up a bench grinder, and making a tool rest for it. In the video I show machining the work surfaces, & mounting them to the machine.
Continue Reading…
After some inclement weather and household tasks that denied me shop time for the last 3 weeks, I was able to get into the shop this weekend and knock out another part of my grinder rest. After some time pondering the design of the part, I decided to change it. The redesign made the part easier to make, and less prone to moving after machining.
This video is the first I’ve shot with my new camera, and I’m very happy with the improved video quality. The audio isn’t that great, but it’s still substantially better than what I got from my old camera.
Reference:
Two of the goals I set when designing when designing the tool rest where specifically related to adjust-ability. First and for most, I wanted to be able to adjust the rest quickly. spending 15 minutes to set a tool up so you can use it for 2 minutes is always a buzz kill. Secondly, I wanted to have as much adjustability as possible. After pondering it for a while, I came up with the slot nut idea. It gives me 1-5/8″ of front to back adjustment, and it can be adjusted one handed.
The following video shows machining the slot nuts. While they look simple they could be difficult to make if you don’t use the proper order of operations.
Reference:
Now that I’ve completed both the wheel bushings, I can dig my teeth into the heart of this project, building better tool rests. I’ve never seen a bench/pedestal grinder that came with what i would consider a good tool rest. To me a good tool rest is one that wraps around both sides of the wheel, and has 2 to 3 inches in-front of, and on both sides of the wheel. In my opinion a lage work surface makes it much easier to grind metalworking tools, specifically threading and form tools. With regards to woodworking, a large work surface makes it really easy to grind plane and chisel blades.
I’m going to purchase a Oneway Wolverine jig for grinding wood turning tools, so the rest i’m building needs to mount in a way that it won’t interfere with it. Thus, my rest will mount to the wheel guard like the stock Baldor rests do. The following video shows the machining of the first of 3 parts needed to make my rests, it also gives a brief overview of what my rests will look like and how they will work.
Continue Reading…
A CBN grinding wheel is a significant purchase, usually costing a significant portion of what the grinder it will be mounted to did, and in some cases even more. Additionally, it can’t be trued like a traditional aluminum oxide wheel, so care must be taken minimize wobble & run-out. In the following video, I show how I made a bushing to mount a D-way 180 grit CBN wheel to my grinder. Besides centering the wheel on the shaft, the bushing was also designed to act as a space that would accurately center the wheel inside the housing.
Continue Reading…

