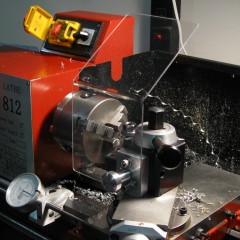
The final step in my change gears/banjo project was to make the special flange nuts that hold the gear bushings onto the studs. Compared to the other parts in the project, these where simple and fast to make, mainly do to the fact that they where small and had large tolerances. I got them done just in time to, because a cold front has rolled in and its now 22 degrees Fahrenheit in my shop.
Now that this project is done, I have some woodworking projects (presents) to get done before Christmas, and then I will be onto my next machining project, an articulated camera arm for the shop. I’m really looking forward to this one, because my current Rube Goldberg set-up is annoying to work with, imagine that.
Continue Reading…
After almost a month long layoff, I’ve been able to get back into the shop and make some more progress on the change gears project. While they where fairly easy to make, the mounting studs where the part I was least looking forward to making. Mainly because I had to make several of them (7 in total), and because each one had a lot of individual steps.
One part of the process I thoroughly enjoyed, was making some custom thread relief tools. I used to avoid making custom HSS tool bits with my old cheap grinder, as it vibrated a lot and was slow at removing material. The new Baldor & CBN wheel combination are silky smooth and remove material very quickly. The surface finish is almost good enough that I don’t need to hone the cutting edges.
Now that I have the studs done, I feel like I’m over the hump, and hopefully I can wrap up this project within the next week.
Continue Reading…
This past weekend I was able to finish of the gear bushings. The bushings are an interesting part to make, because they require what most would consider tight tolerances for a home machine shop. As you can see in the print below, the bushing bore, and outside diameter had tolerances of only a few tenths. Thankfully extreme concentricity wasn’t required so a simple jig/mandrel could be used to hold the parts.
Overall it went pretty well, because while it was repetitive all the steps where pretty simple. I did however scrap the very first part because I was overzealous. I was trying to turn down the outside diameter to close to the final dimension, and ended up undersized and out of tolerance. After my initial mistake, I made sure to leave a little extra material on the remaining parts, so I could bring them within tolerance with wet dry paper.
Continue Reading…
Friday night I finished up machining the banjos, and I have to say I’m very pleased with the results. Initially, I was concerned that the jig wouldn’t be rigid enough, but it ended up working perfectly fine. I had one minor machining related issue, and that was that the hot rolled 4140 I used to make one of the pins, machines very poorly. It was east enough to work around, it’s just one of those things that annoys me.
This is the first video I’ve done with the new mic, and I had some interference issues in a few clips. I wasn’t able to correct them in post this time around, but thanks to my buddy Doug and some testing on my part, we where able to figure out the cause so I won’t have any issues in the future. As a side note I’ve been playing with post processing audio with the Auphonic web service, and desktop application. It does an amazing job of automatically cleaning up the audio, with not real work on my part.
Continue Reading…
Part two of the series starts off with drilling and boring the banjo mounting hole. Boring with a quality boring head is easy to do, but it can be laborious if you have to remove a lot of material like I did. After finishing the mounting hole, I show drilling and tapping for the clamping bolt. The video finishes up with one of my personal bugaboos, slitting the banjo. If you stick around to the end of the video, you’ll see me point out a dumb mistake I made.
Continue Reading…

