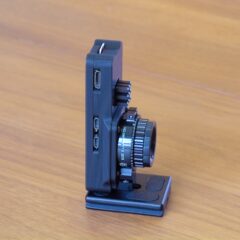
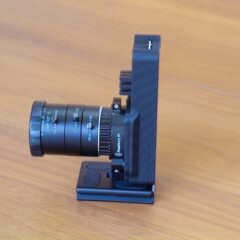
A Raspberry Pi Zero W and HQ camera case
Earlier this year I got into playing around with Raspberry Pis and the official camera modules to monitor my 3d printer. About a month ago I published this python script that will let you live stream h264 directly to multiple browsers simultaneously from any raspberry pi equipped with an official camera module. At the time I wrote the script i had only experimented with the official V2 camera module as that was the latest module supported by the picamera api. I’ve been wanting to try out the HQ camera since it was released earlier this year, so I posted a question on the official Raspberry Pi forum about the compatibility with picamera, and was assured by an engineer it should work fine as long as i allocate a little more ram to the gpu.
Knowing I wasn’t going to waste a bunch of time or money, I ordered an HQ camera module, and a lens that I thought would fit my needs. While I waited for everything to arrive I designed the case shown below to mount it to a Raspberry Pi Zero W. The case is pretty simple to print, and uses 8 8mm long M2.5 button head cap screws to hold everything together. The only tricky part is tapping the 3d print, but it not to hard if you have a steady hand. The case allows for a 12mm x 12mm heatsink to project through it, but it isn’t a requirement unless you are really pushing the Raspberry Pi Zero. One other thing of note, is unless you are streaming at a very low bitrate you need to use an external ethernet or wifi adapter.
Reference:


Nice design! Could you explain the mounting of the case to what looks like a tripod quick connect plate?
The HQ camera module comes with a 1/4″-20 mount on it. I designed the case so the mount protrudes just far enough past the end of the case so that it can be used.
Works for the pi zero 2w also. Just printed this case up. Heatsink hole is about a millimeter off but otherwise everything fits. My heatsink doesn’t poke out of the case so it isn’t an issue.
Nice design!
I’m glad it worked for you. I pan to redesign it, as the Zero 2 W had a bigger chip, and is offset from where the Zero W is positioned.
-Dan
You’re fabulous!
Nice design.
Btw, how do you choose fastening method?
Self tapping screw?
I use a tap and normal screw, but a self tapping screw should work as well.
Just found this. Looks great for a project I am working on.
Was hoping to get Pi Zero 2 W but due to supply issues can only find the Zero W. I have two of them and have not been able to get either to recognize the HQ camera. Did you run into similar issues?