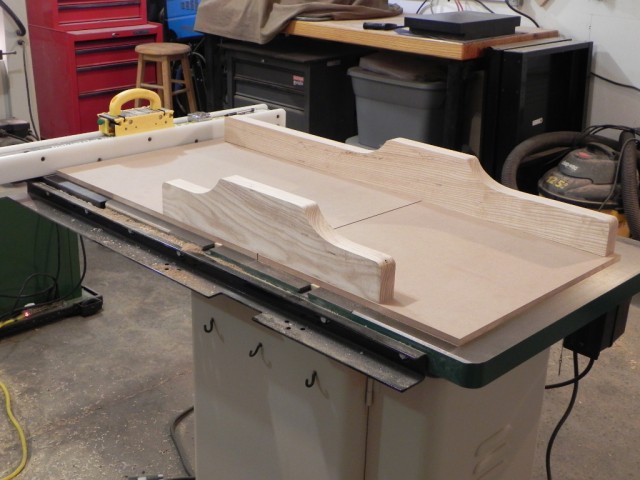
Another crosscut sled
When I got my new saw, I gave my old crosscut sled to my dad since I gifted him my old saw. Thus I’ve been without a crosscut sled since late November. After a few months without it, I realized how heavily I’ve come to rely on it for pretty much every crosscutting task in my shop. I made a video on how to make a simple crosscut sled last time I made one, but I’ve learned some new techniques since then and my needs have also changed, so I thought I should document the construction of what I think is my forth sled.
While my old sled was good for probably 70% of what I do, I decided I wanted the largest sled I could realistically fit on my saw whiteout going off the depend with respect to cost. My only other stipulation was not having to remove the fence to use the sled. With the rough requirements determined, I took some measurements off my saw and various projects I’ve already completed and came up with a plan.
I decided to make the base from a 2′ x 4′ sheet of 1/2″ MDF because it’s cheap and readily available . While 1/2″ makes using bolts to hold the fences in place tougher, it drastically reduces weight and increases the thickness of stock I can crosscut. On my saw the 1/2″ base will allow me to cross cut 10/4 stock. If I move the fence all the way to the right, I have 29-1/2″ of clearance between the fence and the blade, so I made the right side of the base 29″ wide and the left side 19″. This will provide plenty of support regardless of what side I reference stock off of, while allowing me to use a stop block on the right side (my preferred side) for crosscutting stock up to 2 feet in length. When I was taking measurements I found that most of my projects where less than 18″ wide so I decided that would be the maximum capacity of my sled.
With the planing phase done, I roughed out the wood parts of the sled. The fences are made from White Ash, and after jointing and planing the stock 4 square, a pleasing profile was cut into the tops with the band-saw and refined with the oscillating spindle sander. After allowing them 48 hours to move, I re-jointed the faces and bottom edge.
I used a trick I learned from this article by Alan Turner to make the base. Basically you make two single runner sleds. The benefit of this method is that you don’t have to get the runner perfectly square to the back of the base, you just get it close and then make sure you leave a little extra marital to be trimmed away by the saw blade. What you’re left with is a reference edge perfectly parallel to the runner. After finishing off the bases I had what’s shown above in the mockup.


I like the platform of this sled I think I will make one as soon as I am released by my Doctor and can get back into the shop. I have had 2 problems that require a Doctor I had a knee replaced 30 days ago and they found cancer so I have been slowed down. Thanks for the platforn on the sled.
I’m glad you like it Robert, I have one more blog post to write about this project. I’m sorry to hear about your health problems, get well soon.