A small saw till Pt. 2
October 5, 2011 4 Comments
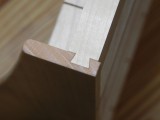
I almost forgot I took the photos, until I found them this evening. The till went together with out any major complications, and after the glue dried, it received a coat BLO, and paste wax. It’s mounted to the wall with a single drywall screw, that’s more than enough to hold the weight. I decided to make the till large enough to hold 4 saws, so that gives me room for one more. I sense a 14tpi dovetail saw in my future.


Looks very nice. My eyes aren’t too good; there are kerfs in the three horizontal pieces on the back to hold the sawblades, and the horizontal piece along the front/bottom leaves an opening, and the handle rests on that piece?
How is it finished, please?
You’re correct about the front piece John, It has a 1/4″ on the outside edge, and a 1/2″ on the inside edge. The horns on the handles catch it and hold the saws in-place. It’s finished with a coat of boiled linseed oil and a coat of wax.
Dan. Just found your blog. Wonderful little saw till. I just ran out of room for my back saws on a shelf in the basement and now I’m now really concerned about damaging them. I’d love to replicate your design here. Seems you like the sliding dovetails. I havent worked with them, how do you create them? Is there a dovetail bit you are using for these? Would you be willing to walk me through the build process?
Here’s my chisel rack. I would have loved to use the dovetail to mount to the wall. Maybe on the next one.
http://lumberjocks.com/projects/55280
Hi John,
I use a standard dovetailing bit in my router table.
This is the bit I use.
http://www.amazon.com/D18-50×8-CARBIDE-TIP-DOVETAIL-ROUTER-DEGREE/dp/B0012JEYIC/ref=sr_1_13?s=hi&ie=UTF8&qid=1344781510&sr=1-13&keywords=dovetail
this video pretty much shows how i do it.
http://www.youtube.com/watch?v=aVk_qHJaRL4